☰
Current Page
Main Menu
Home
Home
Editing Using-ReportParts
Edit
Preview
H1
H2
H3
default
Set your preferred keybinding
default
vim
emacs
markdown
Set this page's format to
AsciiDoc
Creole
Markdown
MediaWiki
Org-mode
Plain Text
RDoc
Textile
Rendering unavailable for
BibTeX
Pod
reStructuredText
Help 1
Help 1
Help 1
Help 2
Help 3
Help 4
Help 5
Help 6
Help 7
Help 8
Autosaved text is available. Click the button to restore it.
Restore Text
#Using ReportParts [[_TOC_]] ##Question What are ReportParts? How do I use them? ##Answer ReportParts are containers for the different sections of reports defined in your system. Using ReportParts allows users to easily create their own dashboards in HTML and ASP. For example, you could create your own aspx web page and insert Izenda ReportParts into it, creating a customized dashboard or webpage. ###ASPX Example You can insert ReportParts into aspx webpages using a custom element on the page. First, your aspx page will have to include a reference to Izenda.AdHoc ```html <%@ Register TagPrefix="cc1" Namespace="Izenda.Web.UI" Assembly="Izenda.AdHoc" %> ``` Then you can add HTML like the following to use a ReportPart ```html <body> <form id="form1" runat="server"> <div> <cc1:ReportPart id=ReportPartID1 runat="server" Report="rep1" Part="Detail"/> <cc1:ReportPart id=ReportPart1 runat="server" Report="ord" Part="Chart"/> <cc1:ReportPart id=ReportPart2 runat="server" Report="tt33" Part="Gauges"/> </div> </form> </body> ``` The Report string should be the complete name of the report including the category. The part value can be equal to any of the following: * Detail * Summary * Chart * Chart2 * Gauges * Map Filters can be added in the javascript example only for the report part. These are numbered based on position number in the report. This filter functionality is limited. At this time it will not support between date filter operators. Filters are added using the following format data-filter1="value" data-filter2="value" Multiple values can be entered using a comma separated list as data-filter1="value1,value2" ###HTML example You can also insert ReportParts into a pure HTML page and display it using javascript First, you will have to include a reference to the javascript file used to render the ReportPart. ```javascript <head runat="server"> <script type="text/javascript" src="http://yoursite.com/yourreportingsite/rs.aspx?js=report-parts"></script> </head> ``` Then you can add HTML like the following to use a ReportPart. ```html <body> <div style="margin:5px; padding:10px; border: 1px solid gray; background-color: white;"> <h1>Sales Chart</h1> <div class="report-part" data-report="Sales" data-part="chart" data-filter1="Country"></div> <h1>Finance Chart</h1> <div class="report-part" data-report="Finance" data-part="chart"></div> <h1>Accounting Details</h1> <div class="report-part" data-report="Accounting" data-part="detail"></div> </div> </body> ``` The data-report tag references the complete name of the report and the data-part identifier should be one of the items listed above, but this is not case-sensitive in this context. The result of the HTML example is shown below. 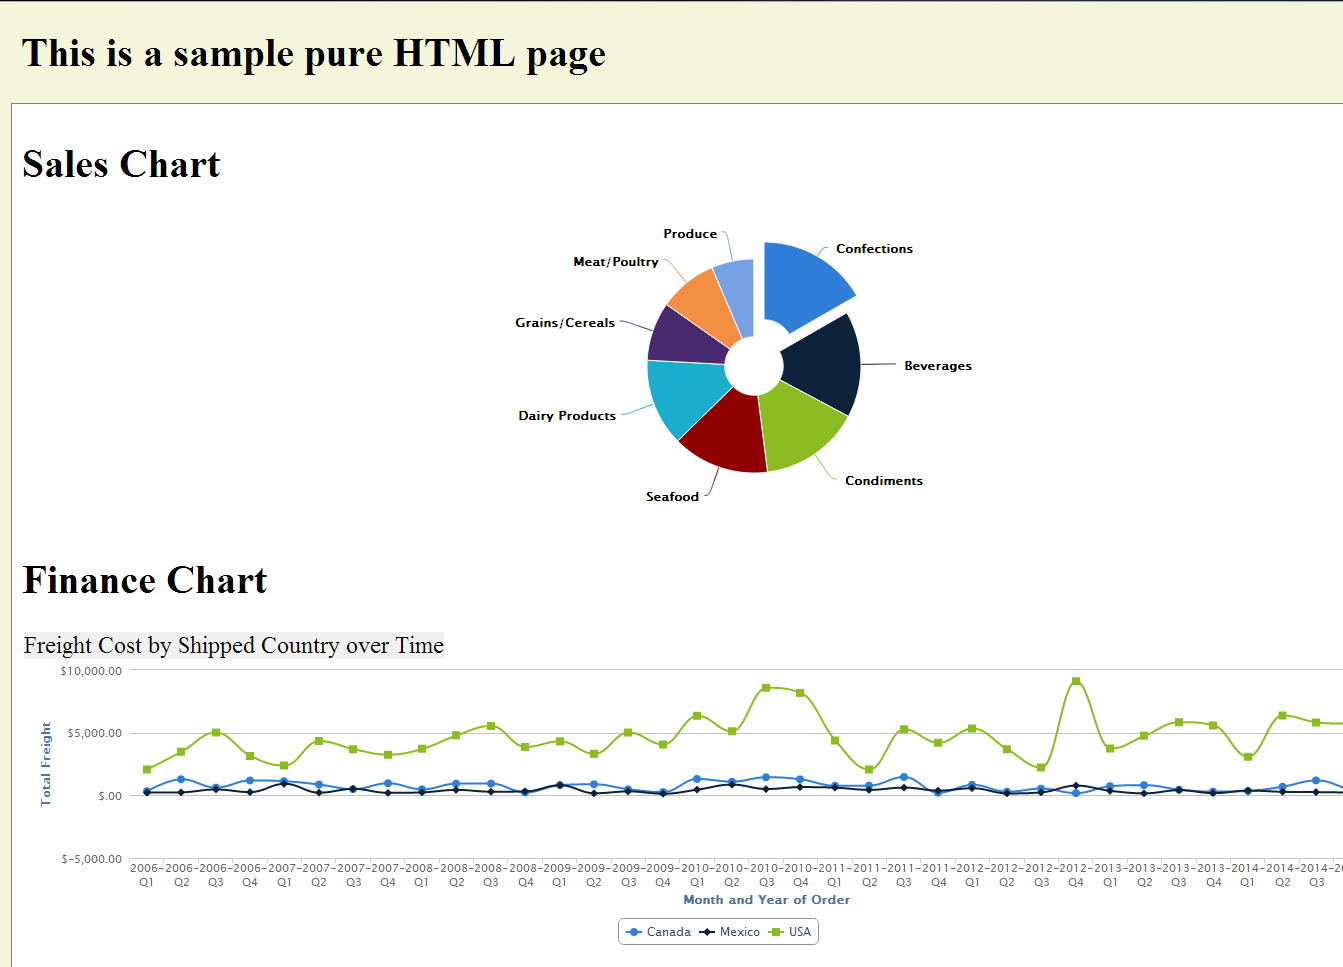 ###What if my custom dashboard is in a separate virtual directory from Izenda? If you are trying to implement report parts on a page that exists in a separate virtual directory from Izenda's response server (rs.aspx), you will likely have trouble rendering those report parts, as the JavaScript files will not be retrieved. You must add a tag to your ASPX or HTML page to embed the necessary scripts: In ASPX: ```html <body> <form id="form1" runat="server"> <div> <cc1:ReportPart id=ReportPartID1 runat="server" Report="ord" Part="Chart" ResourcesInclusion="Embedded" CombineScripts="true" ResponseServerPath="../rs.aspx"/> </div> </form> </body> ``` Pure HTML: ```html <body> <div class="report-part" data-report="Sales" data-part="chart" data-embedscripts="true" data-responseserverpath="../rs.aspx"></div> </body> ```
Uploading file...
Header
 **This documentation is for the legacy Izenda 6 product. Documentation for the new Izenda 7 product can be found at [[https://www.izenda.com/docs/|https://www.izenda.com/docs/]]**
Sidebar
 --- * [[Izenda 7 Series Documentation|https://www.izenda.com/docs/]] * [[Release Notes]] * [[Upgrade Best Practices|FAQ/Izenda-Update-Best-Practices]] * [[FAQ]] * [[Tutorials]] * [[The Izenda API|/API/AdHocConfig]] * [[The AdHocSettings class|/API/AdHocSettings]] * [Developer Links and Guides](/Guides/Developer-Links-and-Guides) * [[Known Issues]] --- * <a href="http://www.izenda.com" rel="nofollow" target="_blank">Izenda Website</a> * [Product Video](https://www.youtube.com/watch?v=X3-yWFq0w5A) * <a href="http://www.izenda.com/blog" rel="nofollow" target="_blank">Izenda Blog</a> * <a href="http://www.izenda.com/company/" rel="nofollow" target="_blank">About Us</a> * <a href="http://www.izenda.com/contact-us/" rel="nofollow" target="_blank">Contact Us</a> --- * [Guide To Report Design](/Guides/ReportDesign) * [Making Custom Forms Video](http://www.youtube.com/watch?v=5b2axJlgdFs) --- * [[Acknowledgements]]
Edit message:
Cancel