
#9.0 Misc Tab
##About
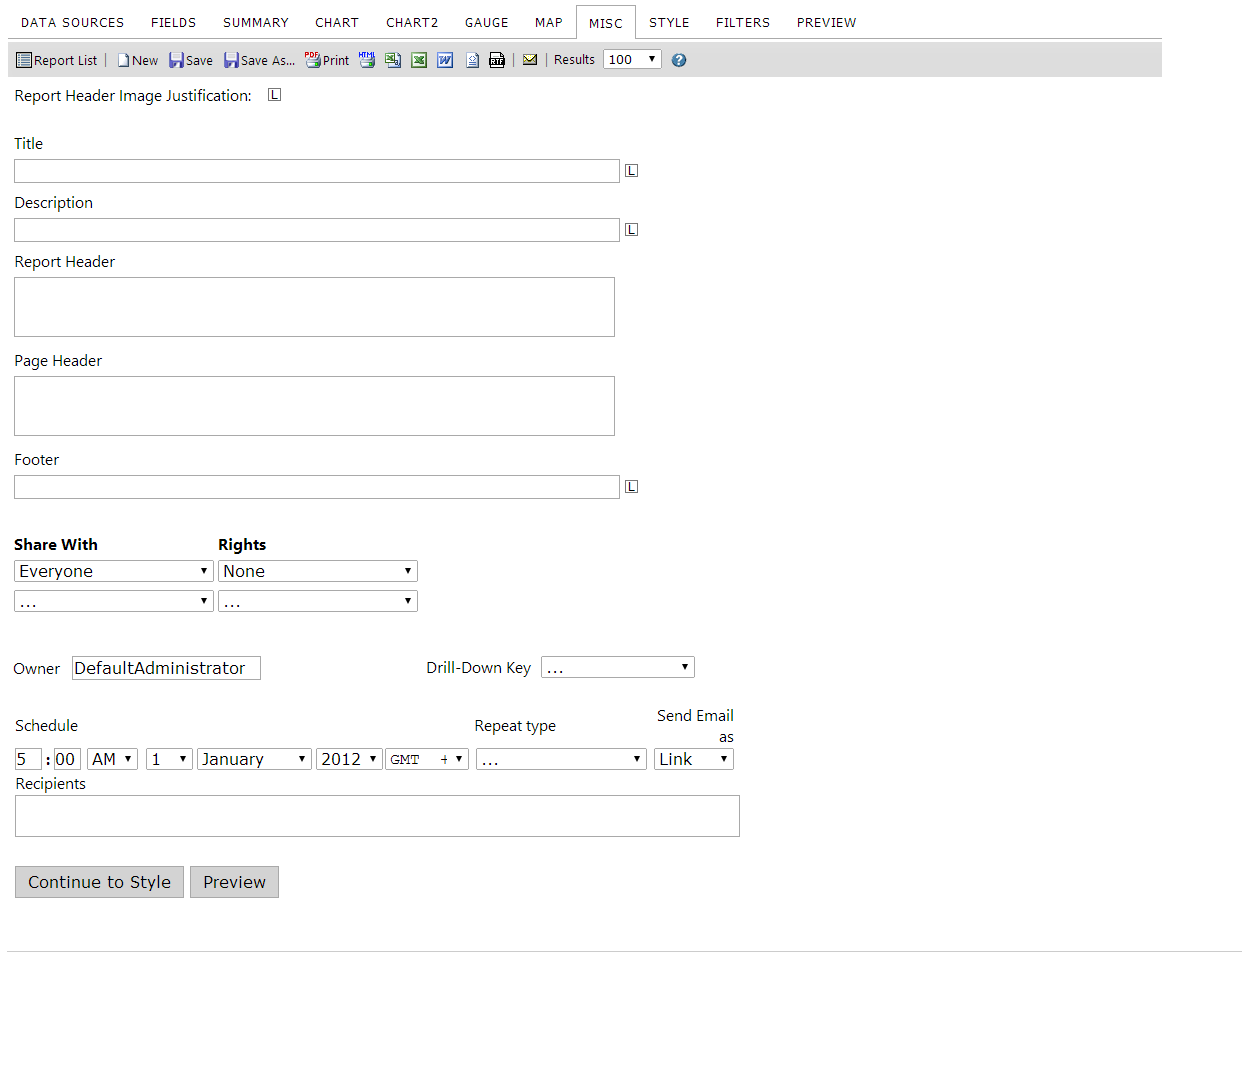
The Miscellaneous (Misc) tab allows you to add a title, description, header, and footer to the report. It also allows justification to be used on each of these items. This is also where the sharing and Scheduling controls are located as well as tools to create a drill-down.
| Feature | Description | Appearance |
|---|---|---|
| Report Header Image Justification | Allows you to move the Report Header to the left, middle or right of the page when the report is viewed. | |
| Title | Enter the title of the report. | 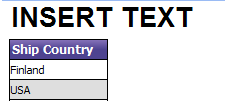 |
| Description | Enter a description for the report. | 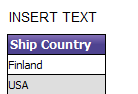 |
| Header | Allows a user to set a report header. | 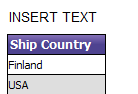 |
| Footer | Allows a user to set a report footer. |  |
Note: In the examples above, "INSERT TEXT" is where you will see the text entered for the corresponding field.
##9.1 Share With & Rights

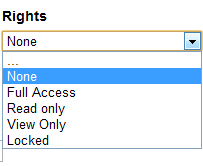
The Share With dropdown allows you to share your report with:
- Everyone - Share this report with everyone who is listed in the dropdown
- Users with specific roles - Share this report with only users who have specific roles (e.g. marketing)
- Specific users - Share this report with specific users (e.g. bob)
The Rights dropdown allows you to give the users you are choosing to share the report with different levels of access. The levels of access you can grant are as follows:
- … - No rights are applied to this report.
- None - The report is unavailable to (hidden from) the users.
- Full access - The report is available for users to view, modify, and save changes to.
- Read only - The report is available for users to view, add or remove filters, and modify the existing filters' values. Users may also modify(design) the report but cannot overwrite the existing report. They may, however, save it as a new report.
- View only - The report is available to the user to view, but not to modify in any way or save changes to.
- Locked (v6.4+) - The report is available to users to view, and users can modify existing filters' values, but users cannot add or remove filters or fields, and they cannot save changes to the report. Users may also not change the column or operator of the filters.
Note: Access privileges will only apply to the user or group selected in the Share With dropdown. All other users will have an access level of None.
Note2: The owner will not change when a user other than the owner saves the report. Choosing "Save As" will create a new report and its owner will be the user that saved the report.
Note3: The "Rights" dropdown menu is hard-coded into Izenda and is designed to cover all possible scenarios concerning user access to reports.
Your system administrator will likely determine the list of groups and users available to share reports with. You may then select who you would like to share your report with. You may also determine the level of access you will give to them for this report using the Rights dropdown. The table below describes the characteristics of each option for selecting the appropriate rights.
###9.1.1 Setting Sharing Permissions
The SharedWithValues and CurrentUserRoles properties allow reports to be easily shared among users and group of users. Here is an example of what these properties can look like when used in conjunction with each other.
AdHocSettings.CurrentUserIsAdmin = (bool)HttpContext.Current.Session["IsAdmin"];
AdHocSettings.CurrentUserName = HttpContext.Current.Session["UserName"];
AdHocSettings.ShowSettingsButtonForNonAdmins = false;

if(AdHocSettings.CurrentUserIsAdmin) {
    //Sam is an administrator in the system and has full access to everything
    AdHocSettings.SharedWithValues = new string[] { "Bob", "Sales", "Alice", "Marketing", "Sam", "Mallory" }; //Sam can freely choose who to share with based on department or username
}
else {
    if(AdHocSettings.CurrentUserName == "Bob") {
        AdHocSettings.CurrentUserRoles = new string[] { "Sales" };
        AdHocSettings.SharedWithValues = new string[] { "Bob", "Sales", "Alice", "Marketing", "Sam", "PR" }; //Bob can share reports with anyone but Mallory but cannot view reports that are not shared with "Bob" or "Sales"
    }
    else if(AdHocSettings.CurrentUserName == "Alice") {
        AdHocSettings.CurrentUserRoles = new string[] { "Sales", "Marketing" };
        AdHocSettings.SharedWithValues = new string[] { "Sales", "Alice", "Marketing", "Sam" }; //Alice cannot share reports with Bob or Mallory specifically but Bob can still view reports created by Alice if they are shared with "Sales" and Mallory can view reports shared by Alice if they are shared with "Marketing"
    }
    else if(AdHocSettings.CurrentUserName == "Mallory") {
        AdHocSettings.CurrentUserRoles = new string[] { "PR" };
        AdHocSettings.SharedWithValues = new string [] { "Sales", "Marketing", "Mallory", "Sam", "Visitor" }; //Mallory can share reports with the Visitor role.
    }
    else {
        AdHocSettings.CurrentUserRoles = new string[] { "Visitor" }; //visitors cannot share with anyone but can see reports shared with the "Visitor" role
    }
}
This sample represents the basic flow of user roles and the "Shared With" values they will see. If we were to log-in as Sam, we would have full access to everything and the values in Sam's SharedWithValues property would fill the dropdown menu. Each user would have different values based on their unique situation.
_Note: If the CurrentUserIsAdmin property is set to true, it will override the SharedWithValues security created by other users, so be careful who you use this property with.
###9.1.2 Owner Control
The owner text field is only available to administrators by default. This field is populated with the CurrentUserName of the person creating the report. If no CurrentUserName is available, the application will default to "DefaultAdministrator". This is the default user account for Izenda.
##9.2 Drill-Downs
Here is a short video detailing the process involved in creating a drill-down report. If you do not want to watch a video, a full transcript of the process is available below as well.
The fundamental difference between a main report and a sub-report is the drill-down key field. Setting this field will enable a report to become a sub-report. So let's start by creating a report in the Report Designer.
###9.2.1 Designing the sub-report
Let's create a report with three fields in it to use as a sub-report.

###9.2.2 Setting the drill-down key
We have a report with three fields created. Now we will set the drill-down key.

###9.2.3 Designing the main report
Once the drill-down key is selected on the sub-report, you will need to design a main report to use it. Let's use one field, the same field we set as our drill-down key from our sub-report.

###9.2.4 Setting the sub-report
You will then want to click on the Advanced Field Settings button for the field you designated as the drill-down key in your sub-report. I.e. if you made ShipCountry your drill-down key, you will want to apply advanced settings for the ShipCountry field on your main report.
###9.2.5 Results
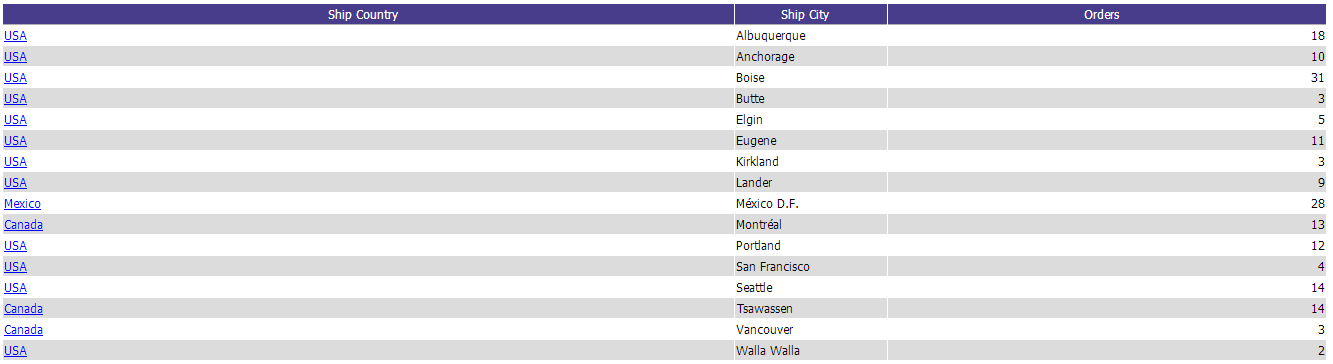
Congratulations! You have designed a report with a drill-down. You may now interact with your main report to view your sub-report.
###9.2.6 Passing Filters from Master Report to Sub-Report
The InheritFiltersinSubreports property that your system administrator can set allows the filters applied in the parent report to automatically pass through to the child report (main report to sub-report).
You can click on the above link for a sample of how this property is applied.
##9.3 Scheduler
Your application will need to be properly configured before the scheduling controls appear on the page. If you do not see them, please speak with your system administrator.
There are several different controls here that we will address.
| Control | Description |
|---|---|
| Schedule | Set the schedule date and time. |
| Repeat Type: | Set the repeat frequency from a list of possibilities. You may also use custom time spans |
| Send Email As: | Sets the format in which the email is sent. Formats include PDF, Word, Excel, HTML, Link, Embedded, RTF, and CSV. |
| Recipients: | Enter a comma separated list of recipients. |