
#Izenda MVC Kit Integration Guide Phase II
##About
Phase II Integration is a continuation to the last step of Phase I integration. This guide will show how to add a login page to an MVC application and give different user roles to Izenda based on user login info. This guide will use Izenda mvc5r3 kit, a simple MVC application, which is downloadable at http://wiki.izenda.us/Guides/MVC-Integration/Sample_MVCApp.zip, and Visual Studio Express 2013 for Web.
Step 1. Connecting to Northwind Database
Get the ConnectionString
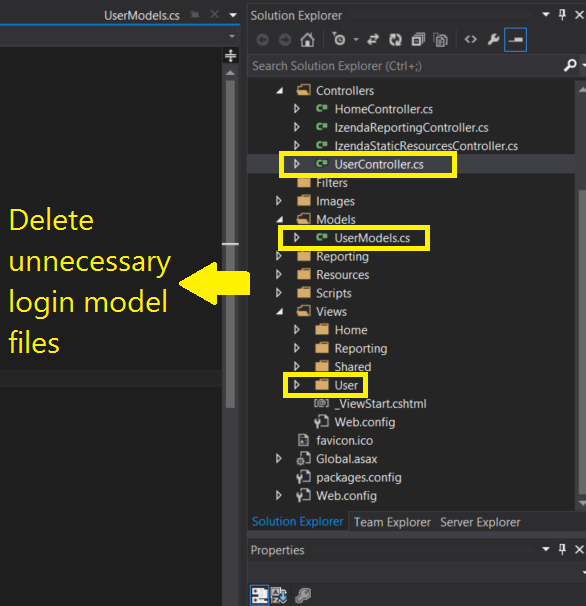
Step 2. Delete unnecessary Login Model files.
The sample MVC app used in the guide already contains its own login model, since we will add a simpler user login model, in order to avoid any unnecessary conflict, delete existing user login files, Controller, Model, and View.
Delete UserController.cs, UserModels.cs, and the whole User folder under Views as below
Step 3. Add Link to Izenda
a. Open _Layout.cshtml in Views\Shared\ in Solution Explorer b. Cut the ActionLink which leads to Izenda as below c. Open _LoginPartial.cshtml in Views\Shared\ in Solution Explorer d. Paste the ActionLink in IF block as below so that Izenda link is visible only after logging in