
#Izenda MVC Kit Integration Guide
##About
This guide is designed to instruct first-time users how to integrate Izenda with simple MVC application. This guide will use Izenda mvc5r3 kit, a simple MVC application, which is downloadable at http://wiki.izenda.us/Guides/MVC-Integration/Sample_MVCApp.zip, and Visual Studio Express 2013 for Web.
##Instructions
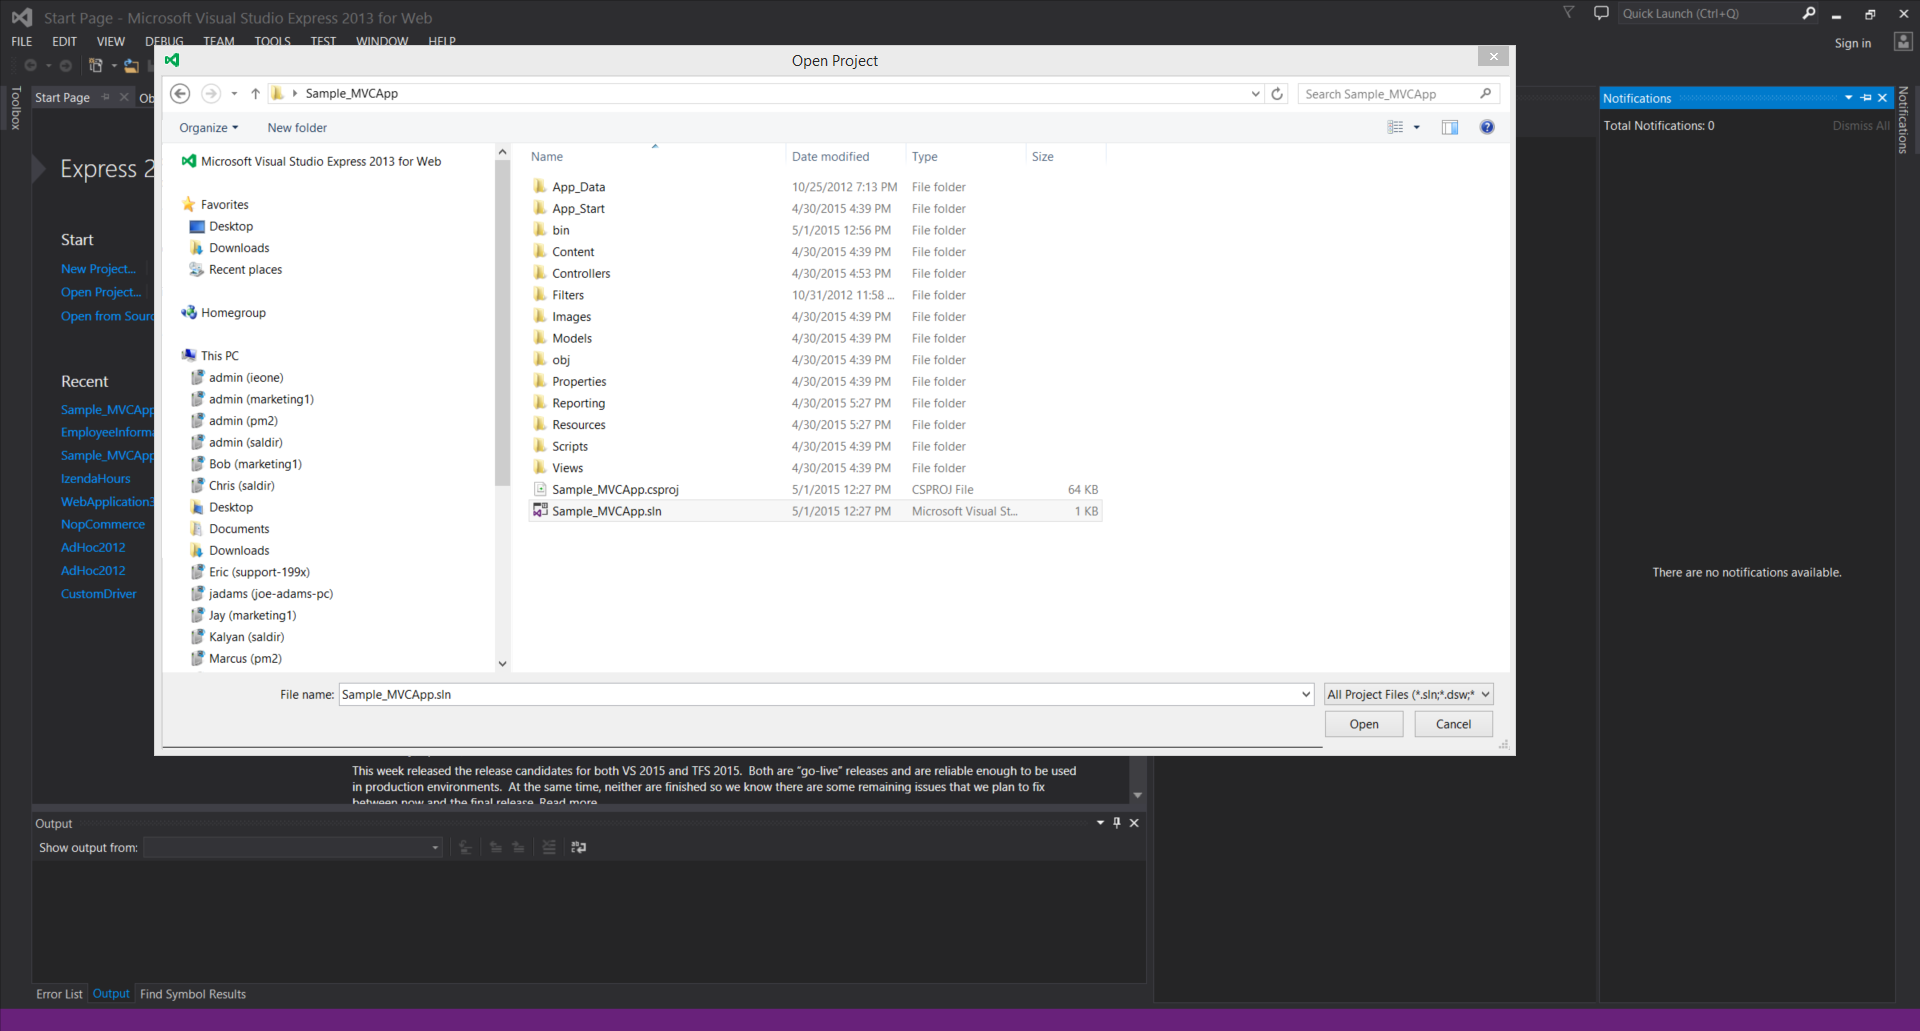
###Step 1. Open the simple MVC application in Visual Studio
###Step 2. Add Izenda.AdHoc.dll and log4net.dll to the project’s reference
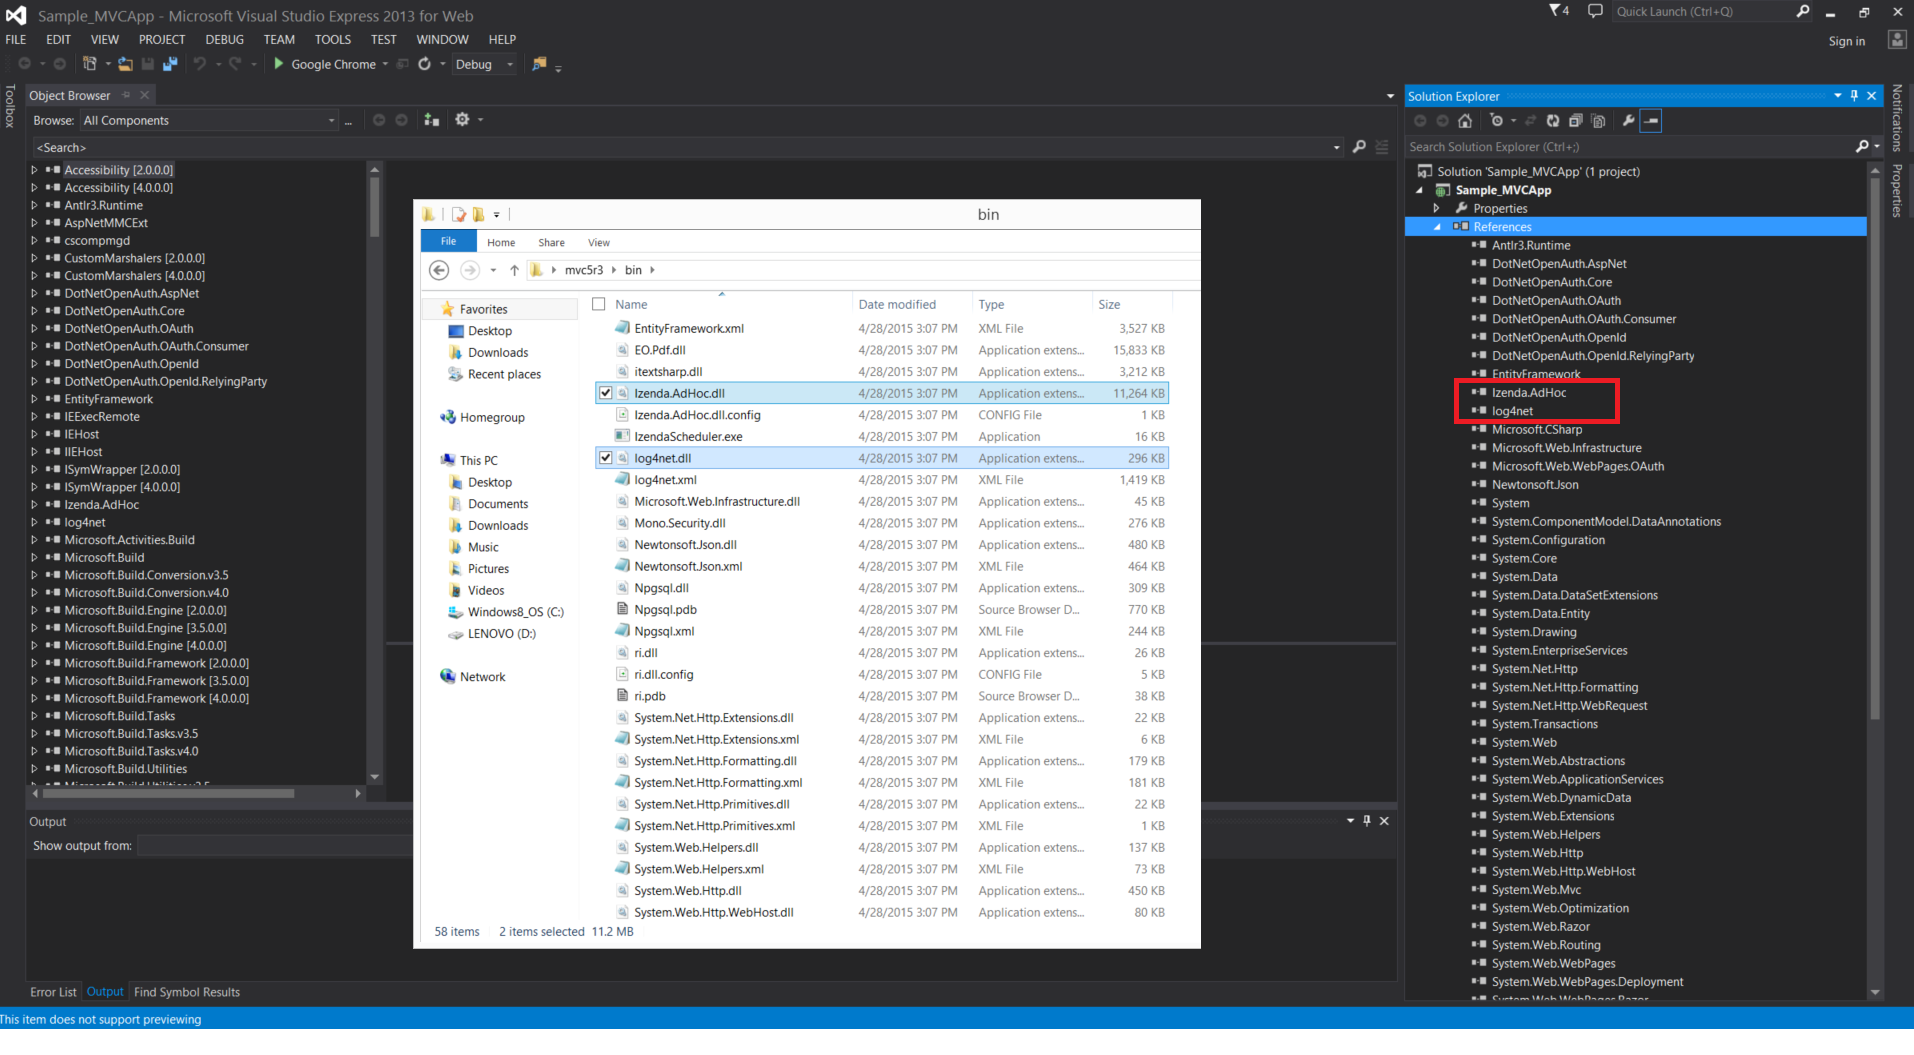
Right click on 'References' under project name in Solution Explorer window, then click 'Add Reference'.
Click the 'Browse' button and browse to \mvc5r3\bin, where Izenda.AdHoc.dll and log4net.dll are. Add them to reference.
###Step 3. Add IzendaStaticResourcesController.cs and IzendaReportingController.cs to the project
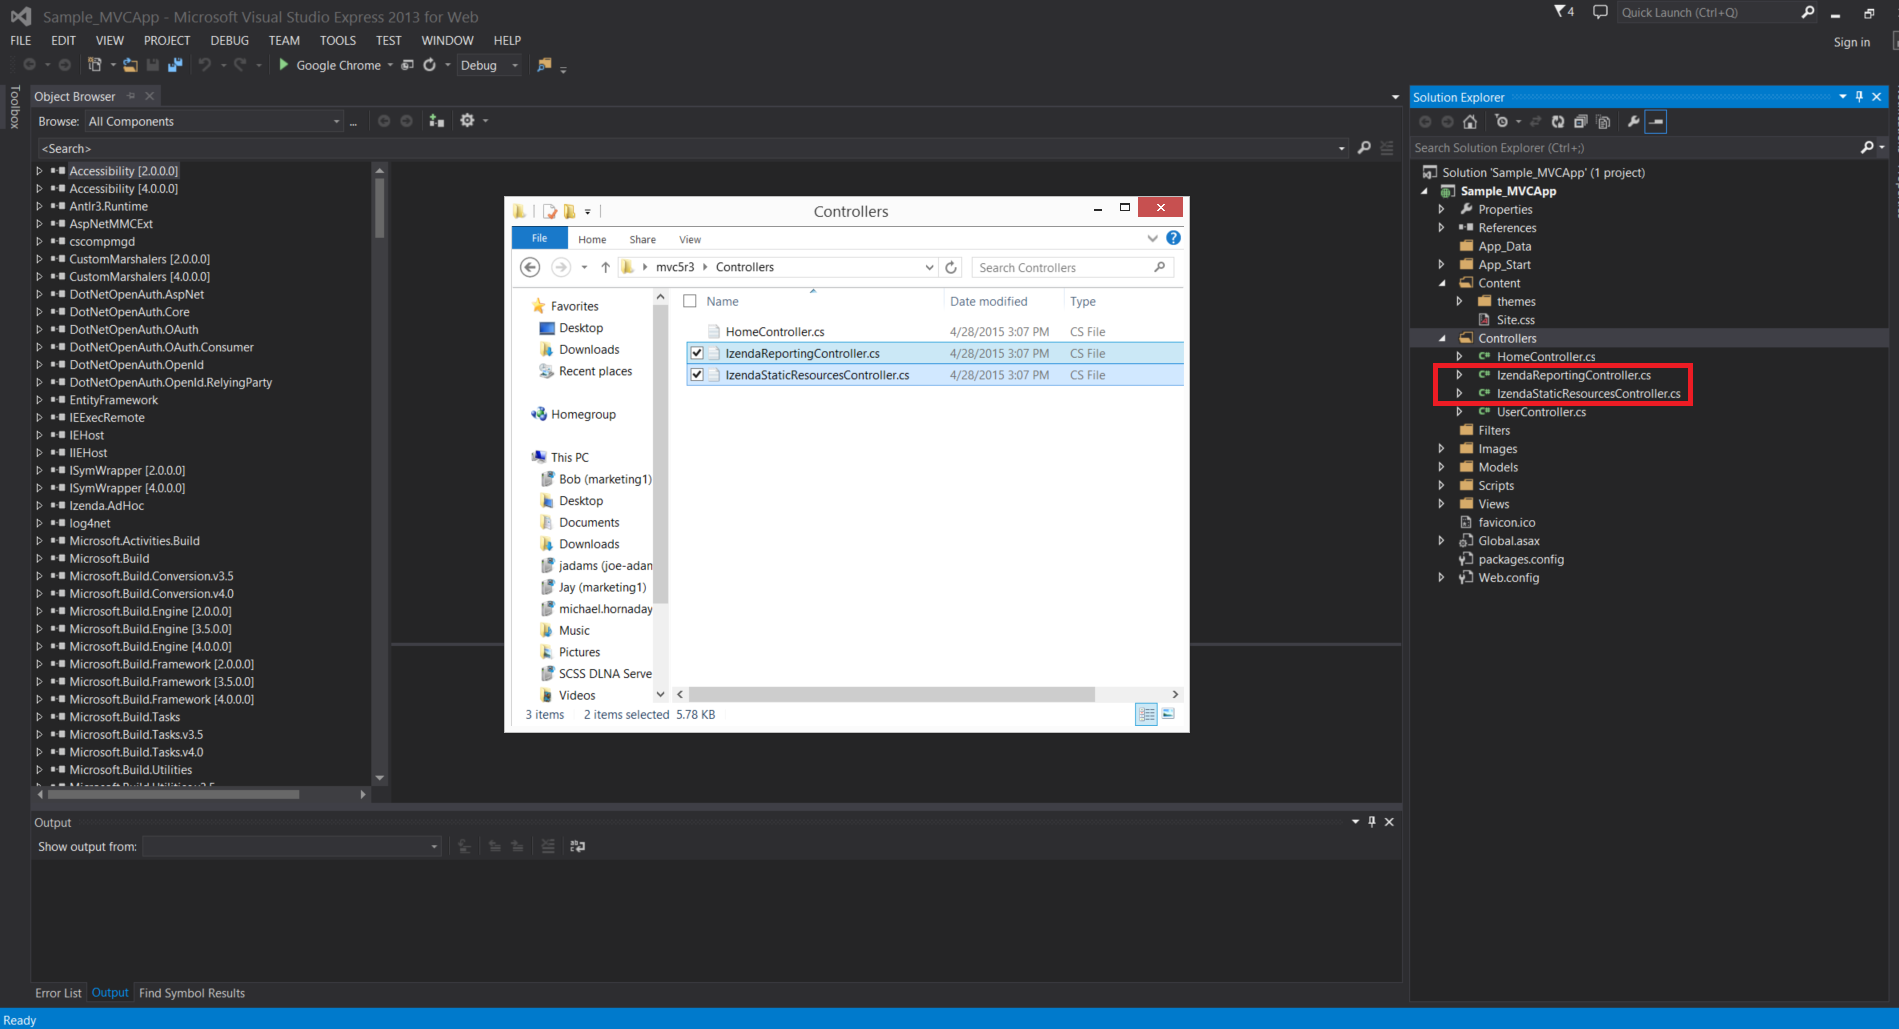
IzendaStaticResourcesController.cs and IzendaReportingController.cs are at mvc5r3\Controllers. Add them under Controllers as below.
###Step 4. Change Namespaces of Controllers
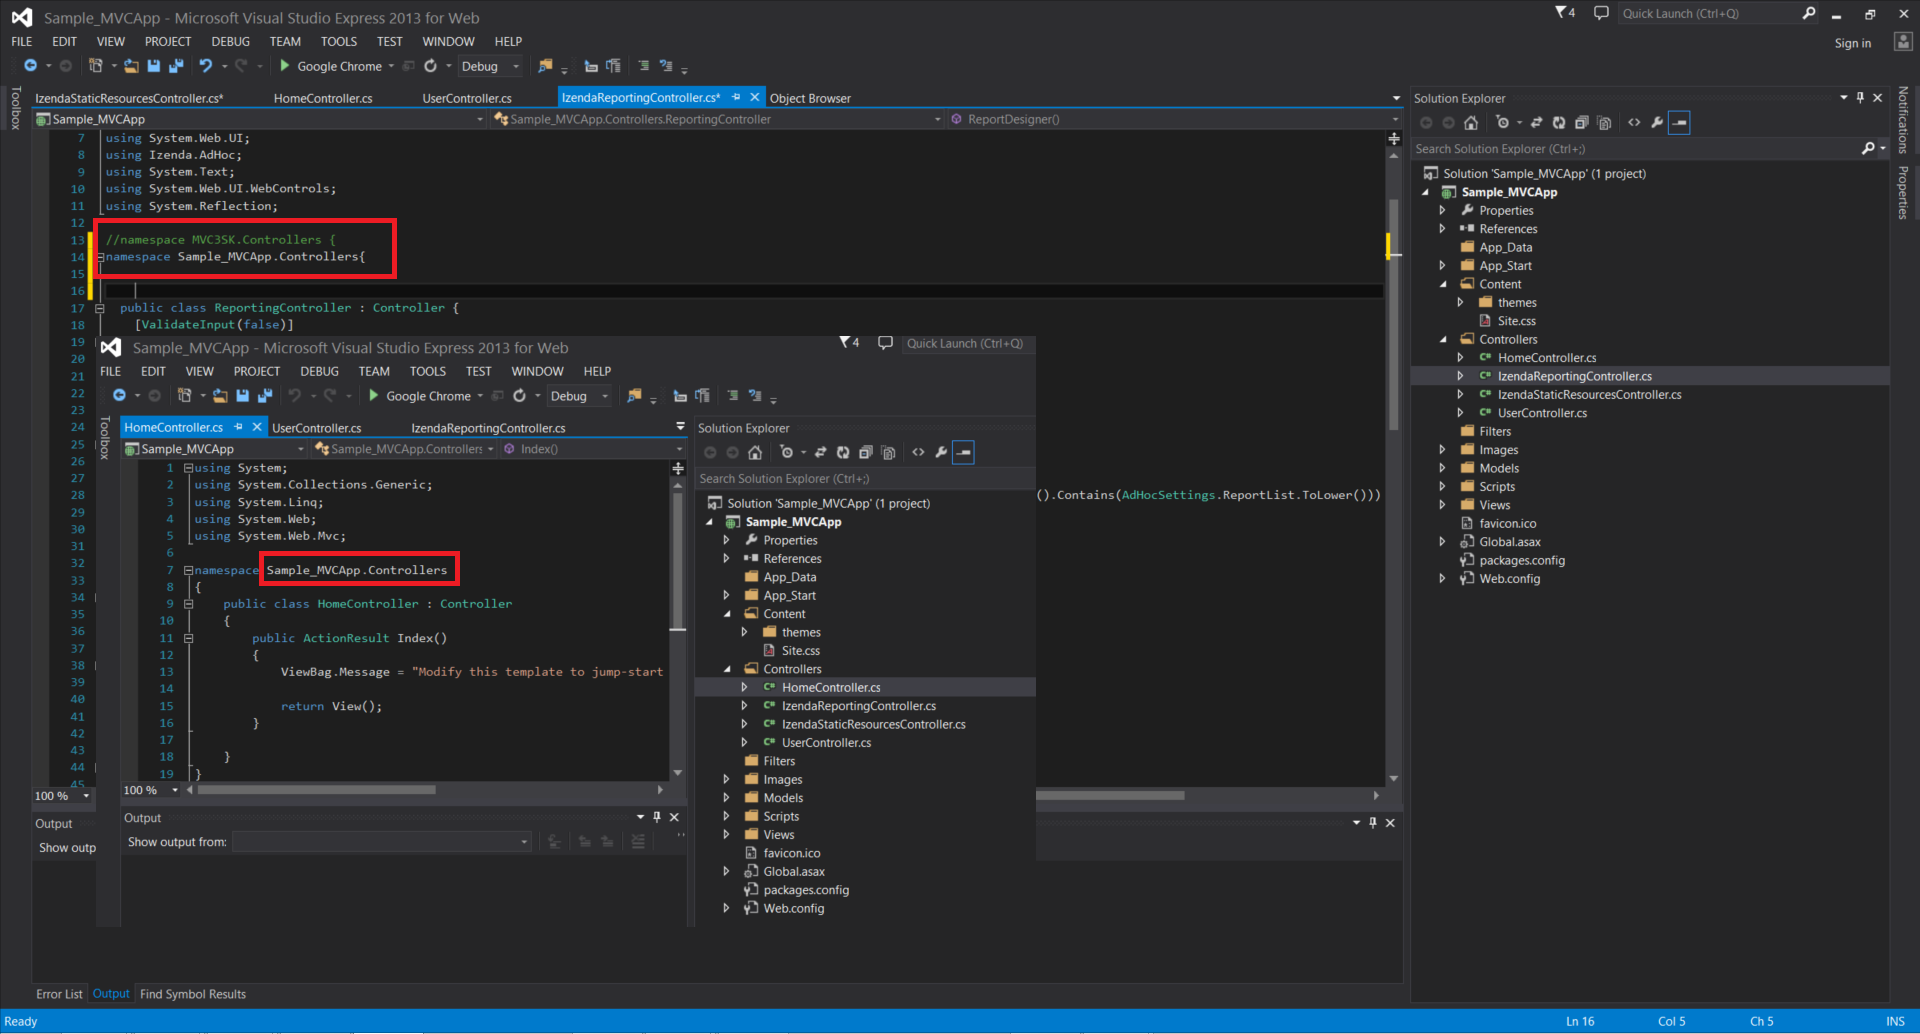
Change namespaces of IzendaStaticResourcesController.cs and IzendaReportingController.cs to match all other controllers in the application. Ex) if the namespace is in other controller file is ABC.Controllers, then MVC3SK.Controllers -> ABC.Controllers
###Step 5. Add Reporting and Resources folders to the project
Change namespaces of IzendaStaticResourcesController.cs and IzendaReportingController.cs to match all other controllers in the application. Ex) if the namespace is in other controller file is ABC.Controllers, then MVC3SK.Controllers -> ABC.Controllers
You can set the license key and database connection in one of two different ways, depending on how much customization you wish to have with Izenda. We will describe the two below.
####InitializeReporting()
T